Top Social

Picture Life

with embellishments...and rain drops!

Image Slider

Quick Quotes Blog

Easter Blessings

Thursday, March 26, 2015
Happy Wednesday everyone, I hope your day has been treating you good! Thank you for checking in, I will be sharing another Easter card with you today. The bunnies stamp is so cute on this card, I have to make couple of these to send out to my friends and family! Thank you JFF for making such beautiful stamps! 


Water colored background (again I know!), I just can't stop playing with the water colors lately. The background is then embossed. The bunnies on this card are not colored, to do this all you have to do is masking. Stamp same image on separate paper, cut it out and lay it on top of another stamped image then color the surrounding with dauber and ink. 


Just For Fun Stamp Used:

I hope you like the card and that it gives you some inspiration to make your own, thank you again for taking time to stop by! Have a fantastic day and Happy Easter to you and your family!

Happy Easter Card

Saturday, March 21, 2015
Happy Friday to you, this is Alexia here! Today I'm going to share a Easter card that is created using Curious Metallic green card stock with you! I will also be sharing the cut file to create this cute Easter card, make sure to download it at the end of this post. 

I used to have bunny as pet when I was little, so I love Easter bunny a lot which is why I must have a bunny on my Easter card! :)


Here is how to create this card:

Step 1: Download cut files and cut the card as shown below


Step 2: Adhere the bunny layer to the back of metallic green card stock


Step 3: Adhere the outer frame around the oval pattern on the front of green card stock


Three easy steps and here you are, a finished Easter card! Stamp and adhere title to the card if you prefer or you can stamp the sentiment on the inside of the card!

CutCardStock Products Used:


Download Cut File: HERE (Please only for personal use only)


Thank you for checking out my post today, I hope you find something you like! Happy Creating!

Table Display

Sunday, March 15, 2015
Hello all, how is your weekend so far? I'm glad to be here to share a simple project with you. I made this table display for party using the chipboard from Clear Scraps in the March kit, it came together with the acrylic frame but I chose to use it on another project. Here is the table display:


To create this display, I used the chipboard piece that is actually part of the acrylic album that comes with in kit. I trimmed a piece of patterned paper just the size of the the chipboard and embellished it with paper flowers and card stock stickers. The white satin ribbon is not included in the kit. 

The top acrylic piece on the table display is a piece that I trimmed out from another project (see picture below). I then glued it to the back of the table display chipboard. 

Here is the acrylic piece I'm talking about (referring to picture above).

It's perfect for table display for wedding or anniversary party! I hope you enjoy the project and it inspires you to create something. Thank you so much for your time and I hope you have a great weekend! 

This kit can be purchased HERE.

Teresa Collins Mini Embossing Folders!

Friday, March 13, 2015
Hello all! This is the second week I'm sharing cards created using the new release of Teresa Collin's mini embossing folders, these embossing folders are gorgeous! This time I chose to use all embellishments from Teresa Collins on one of the cards, what do you think? 


The second card is a very simple card, I embossed on a thick kraft card stock and trimmed a window in the middle.


Products Used:
- Craftwell Teresa Collins Cut 'n' Boss Machine
- Craftwell Teresa Collins Mini Embossing Folder - Starlight
- Craftwell Teresa Collins Mini Embossing Folder

Hope this gives you some inspirations to do with the new embossing folders and remember to check out the entire releases! Thank you for stopping by today! - Alexia

Happy Easter Basket

Thursday, March 12, 2015
Hello all! It's Wednesday and it means it's my turn to share my card with you today. Easter is about a month away but I'm all in the mood to celebrate it already, perhaps because my son cannot stop asking me about Easter's egg hunt (he asks me like every other day since a month ago!). So here is the card of the day and of course, it has to be something about Easter eggs. hehe. 


The background is water colored and the stamped image is colored with Spectrum Noir alcohol markers. I adore the Easter basket stamp very much, it's so cute! 


Just For Fun Stamps Used:

I hope you enjoy the card I share today, have a great day! -Alexia

Chinese Character Banner

Wednesday, March 11, 2015
Hello all, welcome to my blog! Today I would like to share this project of mine using March kit. Now, this is a little different because I'm actually making a project using Chinese characters. I thought it would be great and just in time to welcome the lunar year of goat, I hope this is something you are interested in making.

I created this using the 5-piece acrylic circle album but instead of using all five pieces I used four and the other one would be the project I shared with you last Saturday! If you don't remember, it was an invitation card.

The characters are "合”,“家”, “平” and “安” which means "Whole", "Home", "Peace" and "Safe" respectively. I also put down the definition of each word underneath the Chinese character using the alphabet card stock stickers.


Due to the lighting issue, the color of the following pictures are slightly different compare to the one above.


I even made the green pieces that hang below the banner using card stocks! It looks real, isn't it? hehe


I consider this my favorite piece of home decor that I made so far, I hope you like it too! You can find the kit in the club store HERE. The items that are not included in the kit are the pink twine and blings in the center of paper flowers.

Thank you for your time, I hope you have a fun time creating using Clear Scraps' kit! 

CELEBRATE Invitation Card

Sunday, March 8, 2015
Hello all! It's my second project to share with you this month using Clear Scraps' March kit - it's an invitation card! Love the acrylic products and the choice of card stock in this kit, beautiful design and gorgeous colors. 

I chose to make this using one circle sheet from the acrylic circle album (it comes in 5 pieces but I used the other 4 for a different project, which I will be sharing on another day). 


I trimmed the top off a little but to create a folding card.

Embellished the card with paper flowers and card stock stickers.

Inside of the card, the invitation details. It is also part of the card stocks and stickers.

The only thing that is not included in the kit in this project is the flower blings in the center of the paper flowers.

If you are planning for a bridal shower, birthday party or anniversary party, you should really consider this! It's unique kind of invitation and it's not hard to make. I hope you like it and consider to make this part of your special event! :) Have fun creating! 

This kit can be purchased HERE.

Triangle Tag Gift Box

Friday, March 6, 2015
Hi all! How are you doing today? It's March already which means it's time for Spring! This winter feels so long to me and I can't wait to feel some heat! While waiting for the Spring to visit, I decided to create this Spring project to share with you!

It's a triangle gift box with tag handle, now isn't that cute?! It's perfect to give out to friends or your kid's friends at school! Who doesn't love a miniature gift? Besides, the size doesn't really matter, it's the thought that counts! If you love this gift box and want to make it, you are in luck because the cut file is free for download (personal use only, thank you)! Step-by-step tutorial follows.


Tutorial Starts Here:

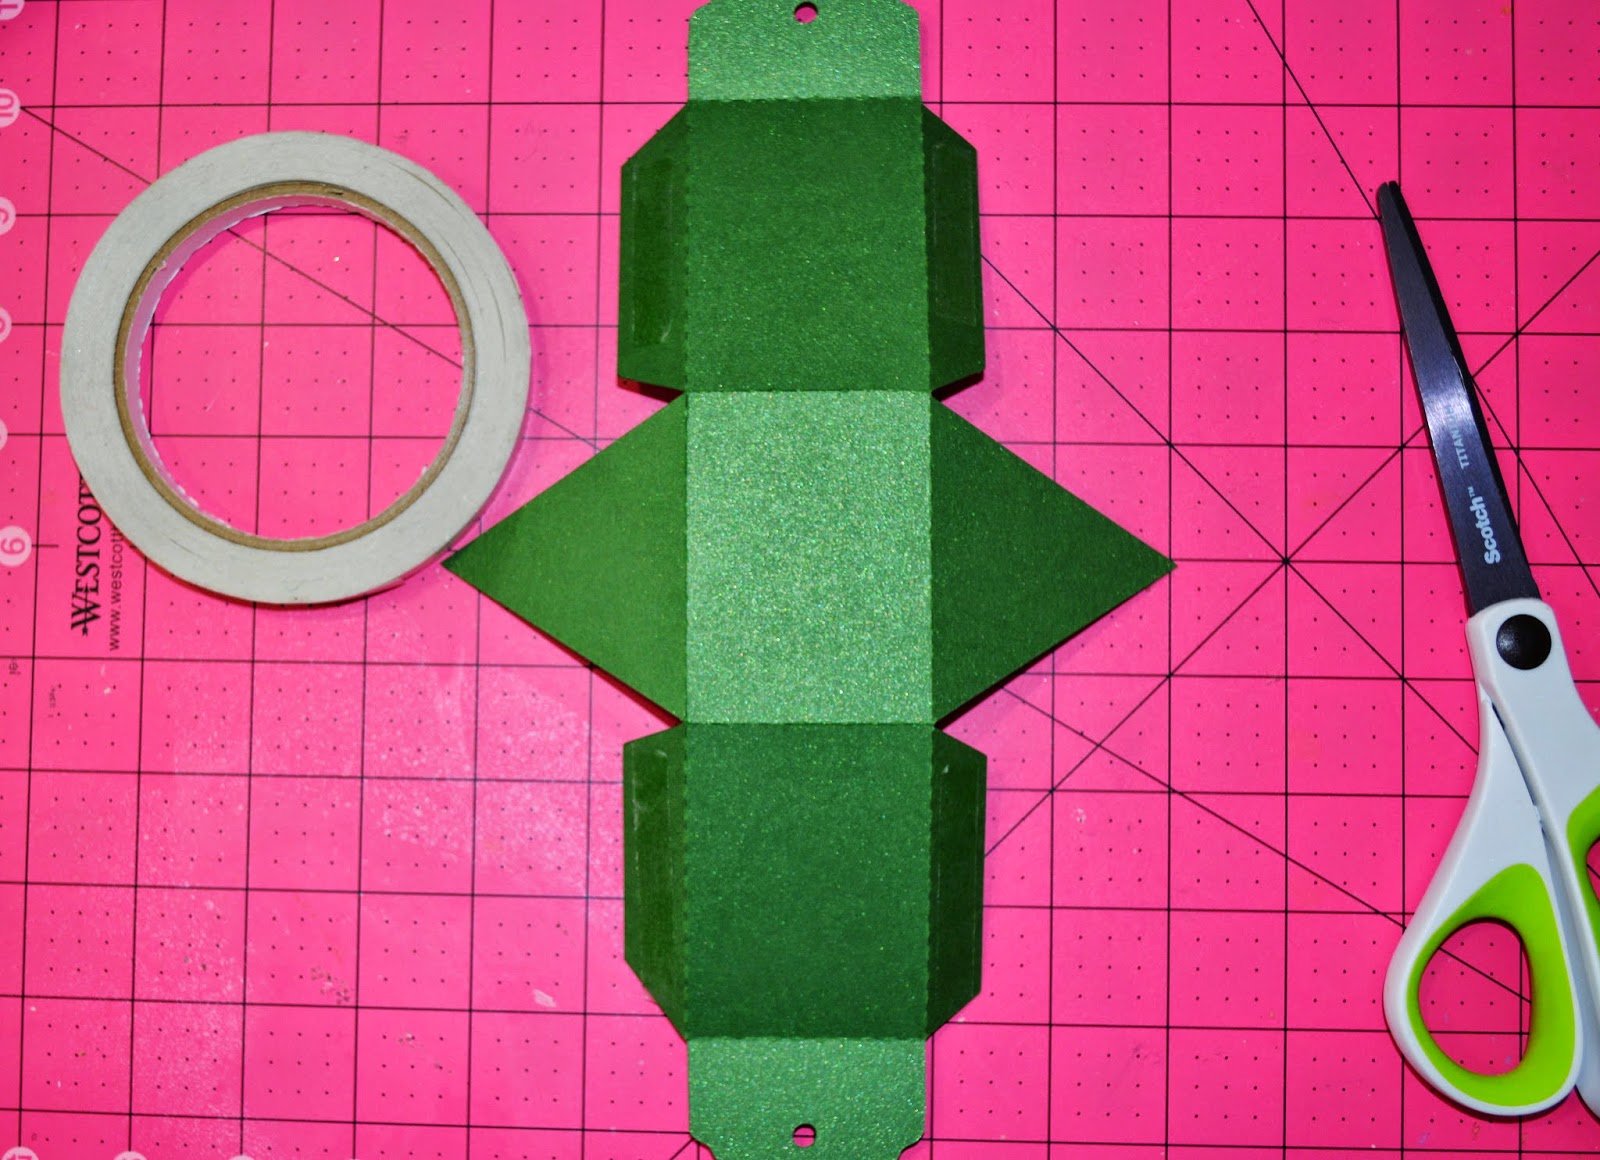
Step 1: Download the free cut file at the bottom of this post. Cut gift box, the file makes one gift box, if you want to make multiple gift boxes simply cut more than once. Use the green metallic card stock for the gift box itself, the thickness of the card stock makes a very sturdy box.

Note: You may notice they are boxes with see through shamrock window on the box and some are not. If you don't like the window version, just remove the shamrocks on the box before cutting. 


I cut a patterned paper for the decorative triangle for both sides of the gift box.


Step 2: Fold along the dotted lines, apply double-sided tape on all flaps.

Note: For gift box with shamrock window, you will need a clear plastic sheet to glue on the inside of the box to prevent treats from falling out (I used clear treat bag).

Step 3: Insert treats into the box and close both opening sides of the triangles.

Step 4: Adhere the patterned paper triangles to both side of the box.

Step 5: Print sentiment and cut out the shamrocks, punch holes on the shamrocks and tie to the box using green and white color twine. 

That's it! You are good to go, the gift boxes are ready for delivery! I hope you enjoy making this project, I'm going to send these to my son's classmates and I think they are going to love it! Let me know what you think by leaving me a comment, I would love to hear your opinion! 


CutCardStock Product Used:


Download Cut File: HERE

Thank you for your time, I will be back soon to share more project ideas with you! Until then, Happy St. Patrick's Day to you! 

Auto Post Signature

Auto Post  Signature