Top Social

Picture Life

with embellishments...and rain drops!

Image Slider

Quick Quotes Blog

True Love!

Monday, December 28, 2015
Hello all crafty friends, I hope you had peaceful, joyous, Merry Christmas! My family and I had a great time with friends and family! It was another memorable time spent with loved ones. 

I'm back today with another card created for Crafter's Companion DT, you know... Valentine's day is ONLY a little over a month away! LOL. That's the thing I love for being crafty, you constantly look forward to creating something all year round. 


Supplies:
- Crafter's Companion Shimmering Cardstock (Rose Pearl, Coaster Pearl)
- Crafter's Companion White Card Stock
- Spectrum Noir Markers (JG5, JG3, DR7, DR5, DR3, DR1, CR9, CR7, CR6, CR5, CR3, CR1, GB10, GB7, GB5, GB3, GB1, BG5, BG4, BG1, BT5, BT4, BT3, BT2, CT4, CT1, PL3, PL2 )
- Die'sire Essentials Dies - Scalloped Squares
- Die'sire Decorative Dies - Elegance Stamping Frame
- Die'sire Decorative Dies - Chantilly Lace Stamping Frame
- 6" X 6" Embossalicious Embossing Folder - Cherry-licious
- Moonbeam Meadow Everyday EZMount Stamp Set - True Love 
- Sentimentals EZMount Stamp Set - Love is all you need

Going back to be with the family! I will be back with more handmade inspirations!! xoxo

Merry Christmas!!

Friday, December 25, 2015
Merry Christmas, Everyone! Have a wonderful celebration with friends and family! 

Jingle Bells Ornament

Thursday, December 24, 2015
Happy Christmas Eve, all my crafty friends! I hope you are all ready to feast and open up all the presents tomorrow (Hope I'm not the only one who's thinking about that)!. Before all that I have a project to share with you, last minute project before Christmas day! 

Last Sunday I went to Michaels to look for a present for my friend and you know it never ends well. I got more things than I needed. I saw this Jingle bells, bigger than the regular jingle bells and guess what, on sale! So here it is...Jingle Bell Ornament!


To create this you'll need:
- Two 3 x 4 and two 3 1/2 x 4 1/2" clear plastic sheets (reuse the plastic packaging box you have), and prepare one 3 1/2 x 3 1/2" for the cover
- Three medium size Jingle Bells
- Any gold patterned card stock (preferably winter themed) 
- A snowflake template (optional)
- Sharpie Marker (light blue)
- Elmers Spray Adhesive


First of all, die cut the gold patterned card stock with TC metal dies (four copies) and using spray adhesive, adhere the die cuts to plastic sheets. Two to the 3 x 4 and another two to the 3 1/2 x 4 1/2. 
Score and fold the excess on both sides of 3 1/2 x 4 1/2" plastic sheets (make sure you adhere the patterned card stock in the center), leaving enough room on all four sides to create the flaps about 1/4" on each side.

Using a snowflake stencil, airbrush the shape to create snowflakes on all four windows of the ornament. Assemble all four pieces together, connect each pieces through the flaps. After that, measure or trace the top on another clear plastic sheet to use as cover (reserve extra 1/2" for flaps).

String three Jingle bells together with twine, now you have to make two knots to ensure the bells stay in place. Tie first knot about 1.5 inches between jingle bells and insert into the center of the ornament. Cut a small "X" on top of the ornament cover which I created in previous step and string the twine through the "X". Here you will need to tie the second knot, right where the "X" is. Glue the cover to the box. Don't forget the bottom of the ornament too, trace/measure the sides on a patterned card stock (I used identical card stock for this project) and adhere to the bottom. 

Here you are!


I hope you like this project! Merry Christmas and have a wonderful holidays! See you guys soon. Ho~Ho~Ho!

Christmas Magic!

Sunday, December 20, 2015
A quick share of one of the most recent Christmas cards I made for Crafter's Companion DT! Image colored with Spectrum Noir Alcohol Markers. Scroll below for the list of supplies. 


Supplies:
- Crafter's Companion Shimmering Card Stocks (Candy Red, Coast Pearl) - Sheena's A Little Bit Scenic - Ornate Snowflakes Stamp Set- Sentimentals EZMount Stamp Set - Happy Holidays- Spectrum Noir Markers (BT5, BT3, BT1, DR5,DR3,DR2,DR1, LG5,LG3, LG2, GB7,GB5,GB3, GB1)- Die'sire Essentials Dies - Scalloped Squares- Snowflakes sequins- Ribbon- Enamel Dots


See you soon!

Starry Christmas Card

Friday, December 18, 2015
Time for another Christmas card today! Made this clean and simple card using Cut 'n' Boss and metal dies. With Christmas around the corner I know there will be a lot of preparation to make so a quick and easy card always first come to mind.


To create the background, color the background with some water-based markers on watercolor paper. I used blue and purple Sparkle Pens from Crafter's Companion. Let dry.

Using star metal dies from Craftwell, create negative shapes on paper. Prepare the landscape embellishments too using the tree line die. 


Adhere embellishments on card, including star wood veneers. This card is now ready to go in the mail!

I hope you like the project I share today, more quick card ideas on my blog! - Alexia 

Floral Dance

Saturday, December 12, 2015
Hello all! I'm back today with a floral card colored with Spectrum Noir Sparkle Pens, they are the best glitter pens I ever used. The fine tip allows you to get to the detail of a stamped image or cut-out like the one I created below. 

Since I took the picture under natural light, it's difficult to capture the sparkling effect offered by the pens. However, I can assure you that you will be pleased by the result you'll get in person. I first color the petals in Aquamarine and the background in Moonlight. Since the Sparkle Pens are water-based, you can mix it with water to create subtle color of image.

Note: DO NOT dip the Sparkle Pens directly in water. You may however use a separate paint brush with water on the coloring surface. I recently purchased a detail and large watercolor brushes from Amazon, I think they work great with the Sparkle Pens.


Crafter's Companion Products:
- Sentimentals EZMount Stamp Set - Love is all you need
Crafter's Companion Watercolour Cardstock

I hope you enjoy the card today and hope you have an amazing day! Happy Creating Everyday! And thank you for stopping by, I'm blessed to have you! 

Holiday Cards!

Friday, December 11, 2015
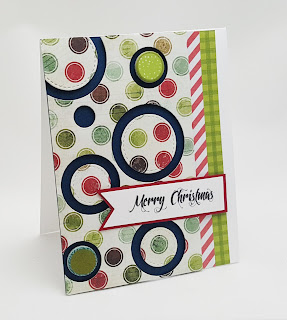
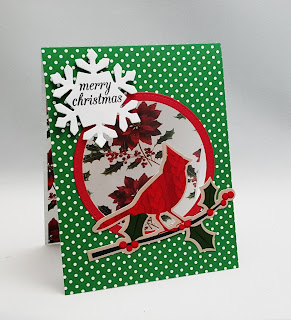
Hi all! Just popping in to share a few holiday cards I created lately, I already sent these out and I'm still making more cards. Will be back to share more!


Handmade With Love

Tuesday, December 8, 2015
Another card for Crafter's Companion DT! It's a window card using clear plastic packaging from dies I ordered from CC, talking about recycling. Every penny well spent! :)

I used the Spectrum Noir Sparkle Pens for the stamped image, it's so shiny and I love it! 


Products Used:
- Crafter's Companion Memories Are Made Stamp Set
- Spectrum Noir Sparkle Pens (Harvest Moon, Smoked Quartz, Starry Sky, Blue Topaz, Solar Red, Pink Champange, Emerald Green, Moonlight, Holly Leaf)
- Die'sire Decorative Dies (Elegance Stamping Frame)
- Bebunni Floral Metal Dies (Cottage Lace)
- Shimmering Card Stock (Candy Red)
- Crafter's Companion EZMount Stamp Set (Tea Time Treats)


Poppy With Love

Friday, December 4, 2015
Another fun card day with Crafter's Companion today! Made this sweet card using a 3D poppy flower die and coordinating stamp, and colored with the new Sparkle Pens! I love the sparkle pens, it doesn't say much from the picture but it looks really awesome in person. You'll have to try it out to find out!

I got the dies and stamps from the summer issue of Inspiration Magazine, it came together as free gift so you get the hard copy magazine and also the actual dies and stamps to play with. How nice?! Not to mention, there is also a CD ROM with bunch of inspirations, tips, etc....can't beat that. 

As you can see, I use the die and cut out the negative image on the patterned paper. Stamp an image on the white card stock in the background and leave it uncolored. Then I stamp, cut out separate petals and color them with Sparkle Pens. Adhere those petals on card using double sided foam adhesives.


Finish up the card with some embellishments and done! I hope you like the card. I'm looking forward to creating different card using the same dies, so I will be back to share with you soon! See you soon!

Happy Creating!

Desktop Organizer DIY

Thursday, November 26, 2015
Are you always looking for organization ideas for your craft room? You have came to the right place! I created this desktop organizer for my son because we have limited space and all his color pencils, crayons, markers are always scattered all over the table (not to mention my craft stuffs too!). As soon as I finished this project, I know I definitely could use another one. So yeah more project and this time my son will help me out (he offered help when I made this first one but since I was at the stage gluing them together with hot glue I didn't let him). 

So here are pictures for the finished project:


What you will need:
- Card boards
- Craft Knife
- Ruler
- Scissor
- Strong adhesives
- Hot Glue Gun
- Patterned Papers
- Craftwell Cut 'n' Boss Machine
- Craftwell eBrush Machine
- Craftwell Teresa Collins Metal Dies - A girl's best friend
- Hazel and Ruby Stencils
- Sharpie Color Markers (Gold)
- Gold Foil Card Stock

Step 1: Cut cardboard into following sizes and wrap and glue pattern papers around each of them.


Step 2: Cut cardboard dividers, two of 4 3/4 x 2 1/8" and three of 3 1/4 x 2 1/4". Same thing, wrap and glue pattern paper around each ones.

Step 3: Assemble cardboard pieces from Step 1 and Step 2 together with hot glue gun, arrange the space you prefer with the cardboard dividers. After that trace the shape of the sides (that looks like a staircase design) and cut the shape out.

Spacing details:
- Second cardboard from the back is 1 1/2" apart from the tallest cardboard (draw spacing on base cardboard)
- Third cardboard from the back is 3 3/4" apart from the tallest cardboard
- Glue front and back card boards to the base cardboard

Step 4: Use H&R stencil 'BELIEVE' and mask out the unwanted area for air-brushing. Remove masks and let dry completely.


Step 5: Die-cut with Cut 'n' Boss the word SPARKLE and star shapes in gold foil card stock. Embellish the organizer.


Here, you save some bucks by DIY this organizer and you can personalize it to the way you want it! Don't forget, you also help saving the environment by reusing those cardboard boxes you have. :) More importantly, you will have fun making it and if you make it for your little one they will appreciate your effort. My son loves it so much he keeps thanking me whenever he uses it. It's all worth it. 

That's all for today, I hope you like the project and see you next time. Have a wonderful day! -Alexia 

Friendship and Flowers Card

Sunday, November 22, 2015
Just popping in to share this card I created for Crafter's Companion DT. Have you tried their Create-A-Card dies? They are fabulous. look how elegant it can be on your card! The size of the die is 6 x 6 but you can trim the cut-out into smaller size and make it into standard 4 1/4" x 5 1/2".

The 3D flower die is also great for creating a feminine card, I love the vine that comes with it too.


Crafter's Companion Products used:
- Die'Sire Create-A-Card 6 x 6 Metal Die
- Die'Sire Classiques 3D Delicate Flower Die
- CC Shimmering Card Stock - Rose Pearl
- Die'Sire Sentimentals EZ-Mount Stamps - Nature

That's it from today, I hope you like the card and decide to explore the endless possibilities of these amazing dies! I'm off to make another card with them now... **wink**

I will be back soon! Thank you for sticking around....!! Hugss...

Upcycled THANK YOU Gift Box

Friday, November 20, 2015
Hi all! Today I want to share with you on how to upcycle a recyclable item into something useful! I had this clear packaging box that I turned into a gift box which I then used to store handmade cards and sent it to my son's school teacher. So instead of sorting it away for recycling, have a makeover and use it again! Besides, I think it looks pretty good for a gift wrap. What do you think? Now you can tell that I'm a hoarder..... ***blushed*** 


Here is the clear packaging that I had...

And I turned it into this....

To make this, you will need:

- A reusable box packaging
- Fall Patterned Papers
- Gold and Foil Card Stock (Optional - you can replace with other color card stock)
- Couture Creations Doilies Die
- Sharpie Markers (Fall Colors)


First die-cut all the embellishments using the dies and Cut 'n' Boss, as shown in following picture. Also, prepare strips of patterned papers and glue around the clear box. Place and adhere doilies on top of the patterned paper and then emboss + adhere the THANKFUL shimmering gold card stock over the doilies.

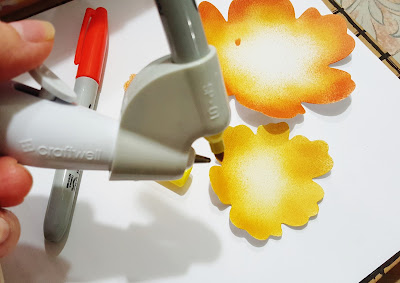
Lastly, air brush the Layered 3D flower die from Teresa Collins, and assemble it. 

Decorate the box with the layered flower and you have this brand new box...

I hope you enjoy the walk through of this project, it doesn't involve many steps and it's always worth it to make something for someone who you know will make a good use of it. :) Happy crafting folks and have a memorable Happy Thanksgiving!! - Alexia

Merry and Bright Gift Box

Wednesday, November 18, 2015
Have you ever need a nice size gift box just big enough to fit in some small gift but can't find the perfect one? With Crafter's Companion Ultimate tool you can achieve any size of boxes you like! Of course, I need to show you the magic. I created this medium size box that measures 3 x 3 5/8" with ultimate tool and it's effortless! If you need bigger size, all you need is a little tweak on the paper size. 


To create this box you will need:
- 6 x 6 Card Stock (for the lid)
- 9 3/4 x 9 3/4" Card Stock (for the base)
- Doilies
- Candied Paper Flowers
- Blings 

Now for the original measurement on the ultimate tool, the height for the base is designed to be slightly larger than the box lid but I changed a little for my version. I prefer a box with taller base. You can follow the guidelines below to create the box.

Step 1: Place your 6 x 6 card stock against the panel that labeled "box lid" and score at the second score line, score all four sides.

Cut the score card stock as follow to form tabs

Step 2: Place your 9 3/4 x 9 3/4" card stock against the panel that labeled "box base" and score at the second line from the bottom. Score all four sides. Cut the ones marked in red below to form tabs (so we can glue them together to form a box). 

Step 3: I decorated my box with doilies, such as following (this step is optional)

Step 4: I colored a stamped Christmas image using Spectrum Noir markers and use it to embellish the top of my box lid. I also stamped a sentiment "Bright and Merry" and make it into a tag for the gift box.

Step 5: Embellish with paper flowers and blings. 


There, you got all the steps to make this gift box, I hope you'll have fun making it and filled it up with treats crafty goodies and send to someone you love! I actually sent mine to a "secret sister exchange" friend, I filled it up with washi tapes. My favorite ones! :) If you are interested in this game you might want to check it out on my FB, it's kinda fun to send a gift to someone you don't know. Everyone needs a littke RAK once in awhile. :)

I hope you enjoy the tutorial today, have a great time creating! Hugs and <3 nbsp="" p="">

Auto Post Signature

Auto Post  Signature