Top Social

Picture Life

with embellishments...and rain drops!

Image Slider

Quick Quotes Blog

You are a Whoot!

Thursday, February 26, 2015
Happy Wednesday!! This is Alexia here and I'm just popping in to share a card that I created yesterday! I was going to make a card for Chinese lunar year of goat but I was so busy preparing everything else I didn't have time to make one. So yesterday I decided to make this card using the owl stamp instead. I love this silly looking owl, too cute! And again, perfect sentiment from JFF! 

To create this card, I first embossed a tree pattern using embossing folder from Darice and water colored it. Next will be stamping and coloring the owl, this part is fun! I used Copic this time instead of Spectrum Noirs alcohol markers, it appeared that I'm more used to using Spectrum, maybe because I have the entire collection so it's easier to match colors.


JFF Stamps Used:
- Flirty Owl 
- You're a whoot

I hope you like the card today, JFF has a lot of fun stamps and matching sentiments you might be able to find something you like! Thank you for taking your time to check out the blog today, I wish you have a great day! 

Ombre Birthday Card

Wednesday, February 25, 2015
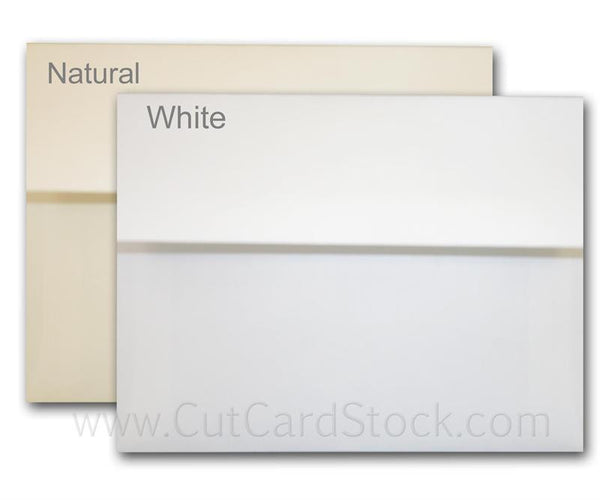
Happy Wednesday everyone! How are you doing?! Tomorrow is one my son classmates' birthday (she is turning 5) and I made this card for her. It's not too carton-ish because I'm not used to making cards for kids. I hope she will like it.  Before I start I would like to share with you that CutCardStock is having sale on the Metallic card stocks this week (I used it on my today's project too), check it out!

Now, here is the card that I'm talking about: 


To make this card, I first stenciled the card background on CutCardStock's Classic Crest solar white card stock in an ombre pattern, at the same time I masked out the area where I want to keep the sentiment. I also stenciled the two yellow bars to bring the focus to the center of the card. Next will be stamping the present images and coloring them with alcohol ink markers.


To create a matching envelope, I stamped the same present images on a CutCardStock's A2 white envelope. I actually also heat embossed the back of the card with my name and email address and I can tell you that this Metallic card stock is perfect for heat embossing. The card stock stays flat during and after embossing, totally worth investing for all who do paper crafting. 

CutCardStock Products Used: 


I hope you like my project, it's fun to play with stencil and inks! I would love to see what you create too. Thank you for checking out my post today, I appreciate your time! Happy Creating! 

Quiet Moments Mini Album

Saturday, February 14, 2015
Happy TGIF to all, the weekend is finally here and what's your plan? If crafting is one of the must-dos on your list then I have this little project idea for you! This is my third project using Clear Scraps' February kit and I can tell you this sweet pocket-sized mini album is something you will want to have. It's so adorable and it's great for making brag book/album or giving it out as gift.

I created this mini album with my children's pictures in it and I have it in my purse to remind me about how lucky I am to have them in my life and one of the reasons that got me started in creating and capturing memories. I love the Prima's flowers, it coordinates well with the paper choice in this kit. 


Here are the shots of the inside of the album, I use a trim or ribbon (not included in the kit) to tie all pages together.


You can also add more pages to it with card stock if you think the album has too few pages. I had so much fun making this project because the album is small so it doesn't take much time to create. Decorating it was the part I enjoyed most because I love embellishments! 

I hope you enjoy this project! To get this February kit, go to Creating Made Easy Kit Club

Thank you for visiting the blog today, I hope you have a wonderful day! -Alexia

I Love You, You Are My Sunshine!

Friday, February 13, 2015
Happy Thursday everyone! It's Craftwell and Hazel & Ruby project week two here and today I want to share two cards I created using amazing products from both companies! Since Valentine's day is approaching, I created this "I Love You" card to celebrate this occasion.


Here is how I make the card:

Step 1: Trim a 4 x 5 1/4" card, trace a heart shape on the card and arrange masks within the heart shape.


Step 2: Water-color the card


Step 3: Before peeling the masks off, coat the surface of the card with Wink of Stella glitter pen. Let dry then peel masks.


Step 4: Run cardstock through Cut 'n' Boss to use as card base (using Teresa Collins A4- size embossing folder).


Step 5: Embellish card with sequins and wood veneers. And here is the card!


I also made this simple card for one of my friends, who's always being so supportive and caring for me. She is my sunshine! I use the map paper from Hazel & Ruby as the card mat and the masks for airbrushing. Then I die cut the bird die using Cut 'n' Boss and use it as embellishment.


Products Used:

And that's it for today, I hope you like the cards! Have a wonderful day and Happy Valentine!
- Alexia

Valentine Shaker Card

Thursday, February 12, 2015
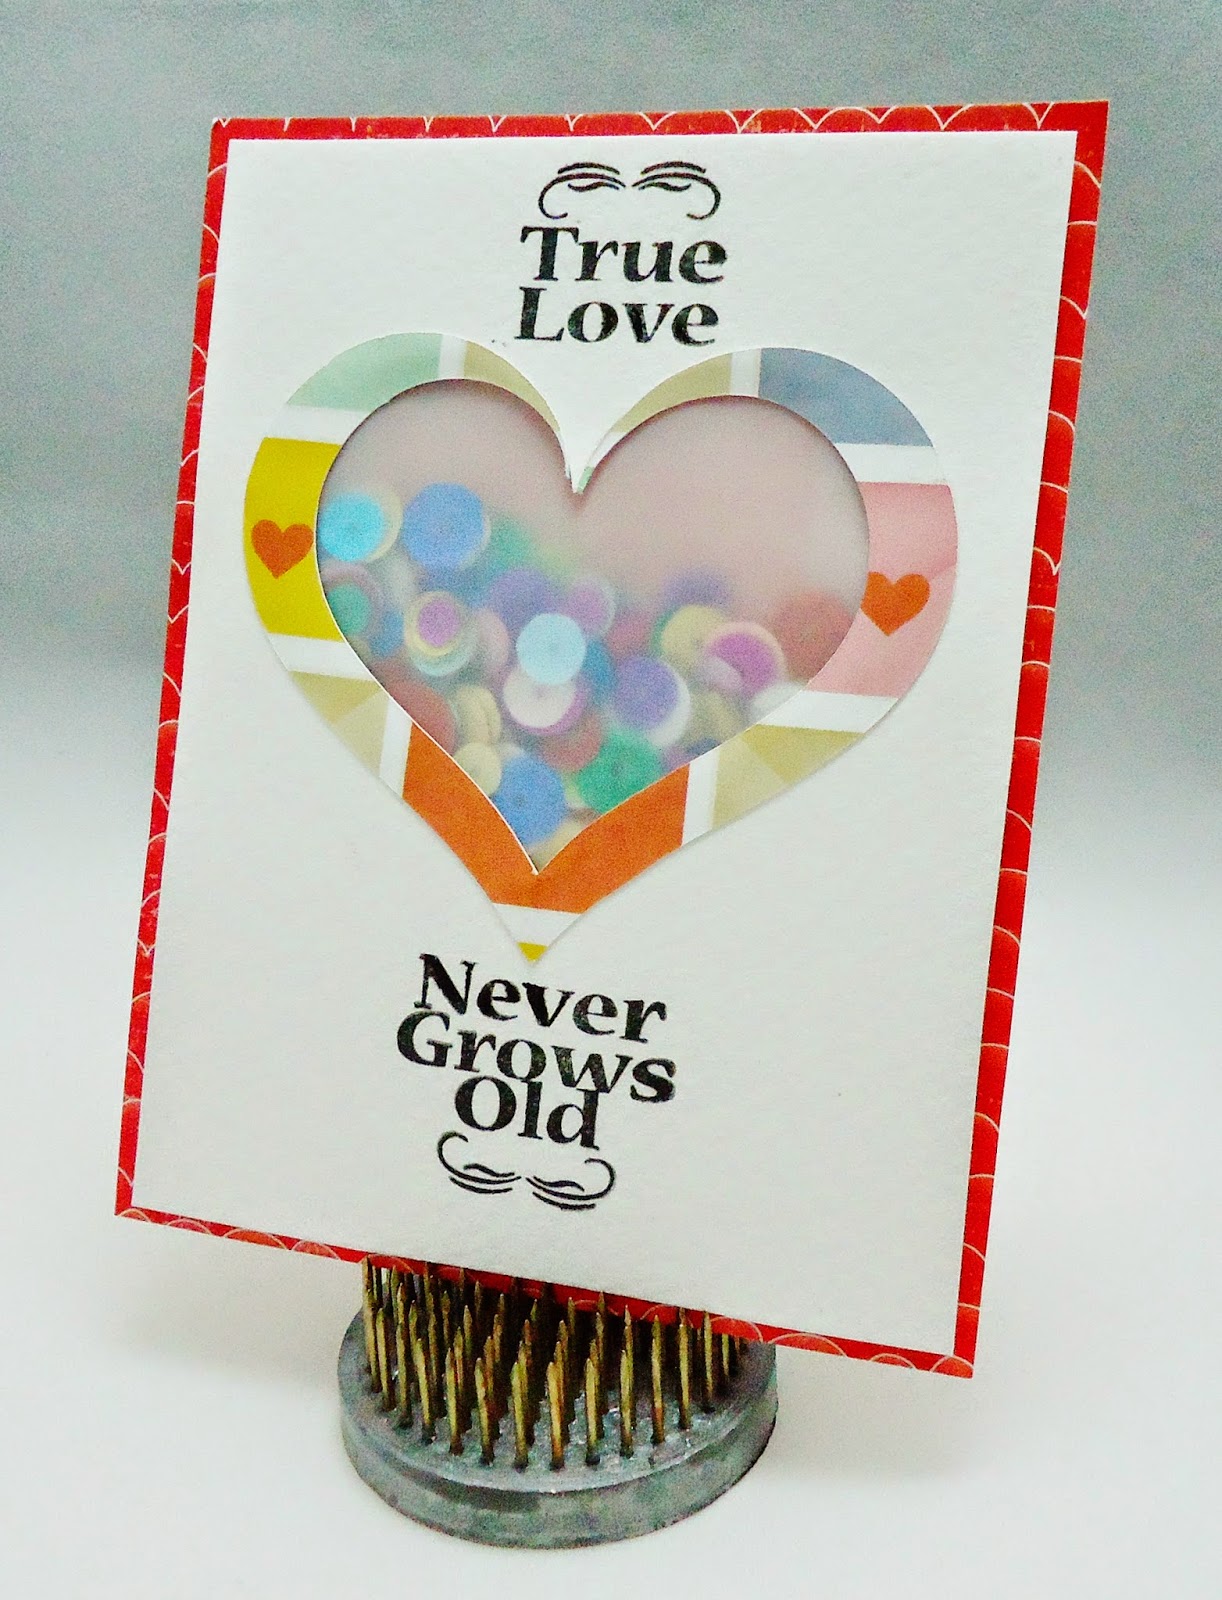
Happy Wednesday! Thank you for taking time checking in the blog today, I'm happy to be here to share a card for Valentine with you! Valentine's day is next week, will you be celebrating it with your loved one? I created the following shaker card for this special occasion, love the sentiment from JFF!


I used a single stamp and stamped it as two separate messages, the one on top and the one on the bottom. To do this, simply ink your stamp and use a piece of tape to cover the part where you don't want it to be stamped on the card. Do the same to the other part of the message.


Just For Fun Stamp Used:

Thank you again for visiting my blog, I hope you like the card that I share with you today. Happy Valentine!

Lollipop Tag Holder for Valentine

Wednesday, February 11, 2015
Happy Tuesday everyone! It's Alexia here and I'm going to share a Valentine project with you today! I made some lollipops for my kids last week and made extra for him to bring to his classmates on this Valentine's day, I was thinking to create something different to go with the lollipop, something that can also be a keepsake item. So I came up with this tag holder to hold lollipop! 

Now how do you like some of these?! I think it's cute and at the same time useful. You can use is as bookmark too! I came up with a simple tutorial to create this, I hope you will make some too!


Here is how I make it:

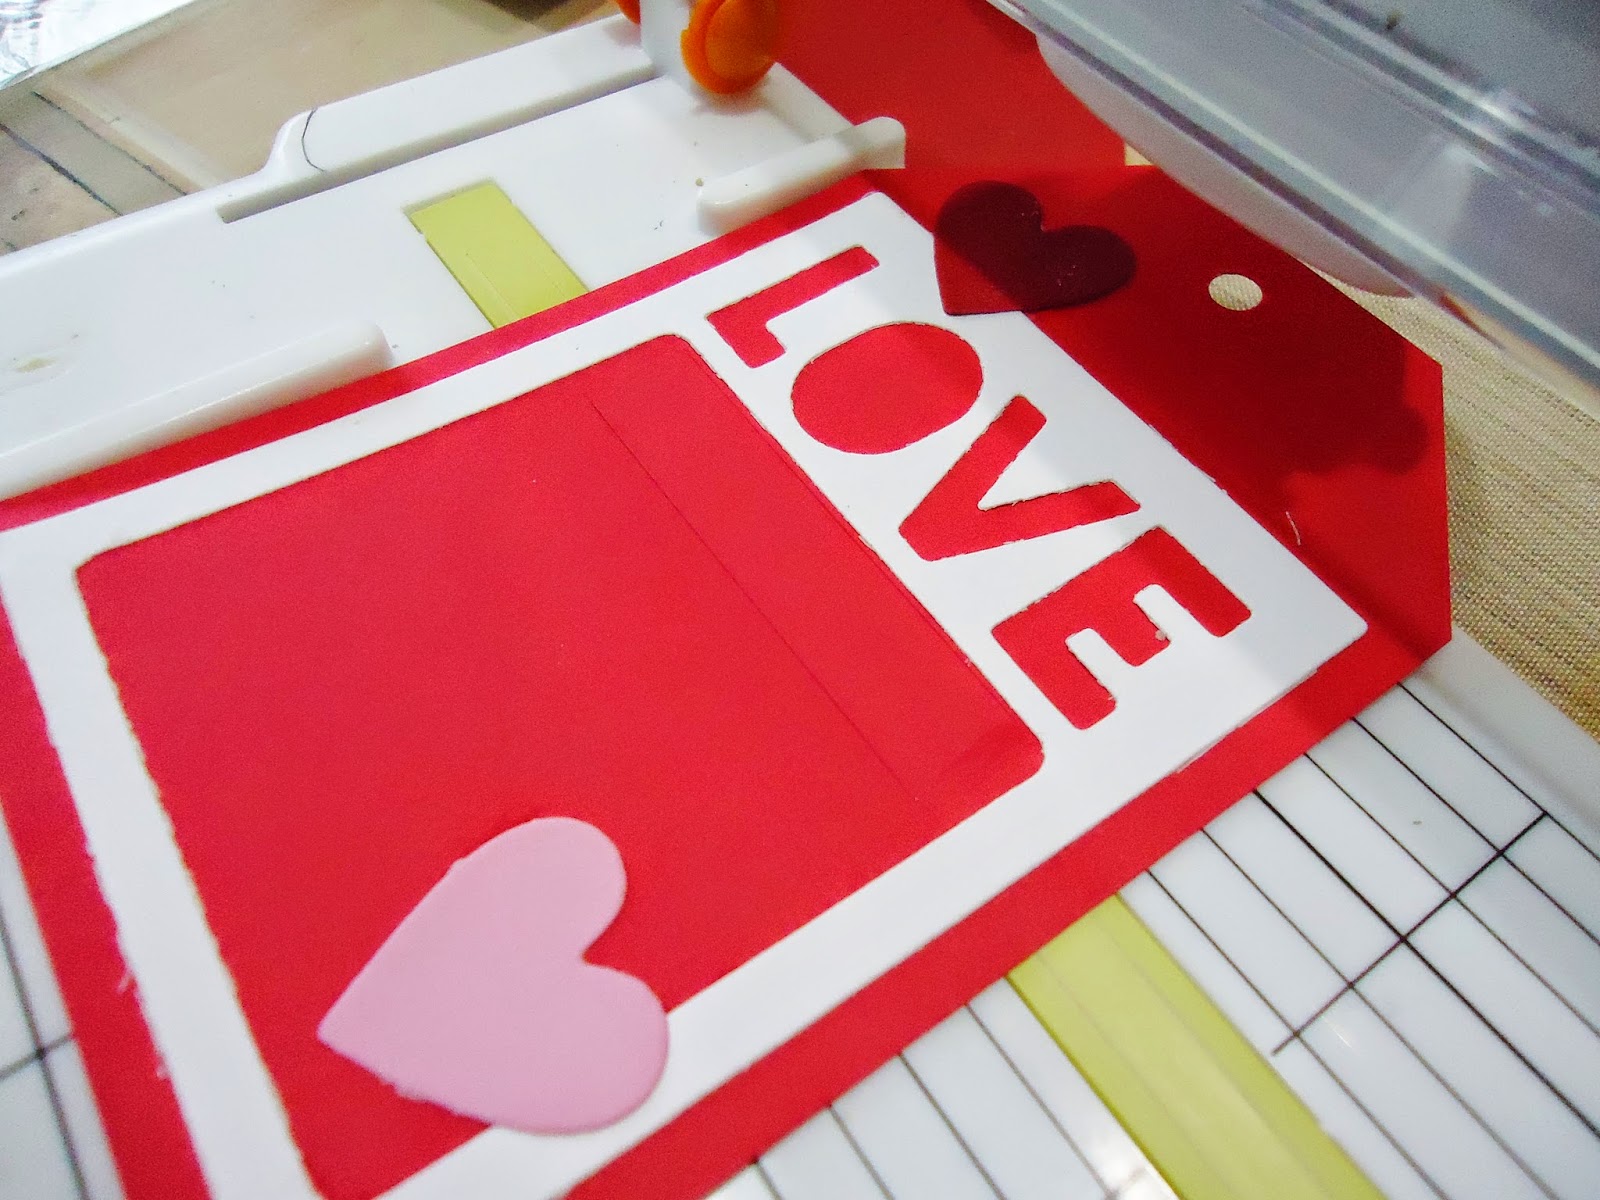
Step 1: Cut embellishment for the tag, I used the "Love" frame die from Teresa Collins. At the same time, cut heart shape embellishments in pink.

Step 2: Adhere cut outs from Step 1 to pre-cut tags (which I prepared beforehand).

Step 3: Punch holes on tags and decorate tags with heart shape embellishments that you prepared in Step 1.


Step 4: Create the insert for lollipop using paper trimmer, simply cut two lines in the middle of the tag. Trim ribbon and insert ribbon to tag.

Here is how they look like! Now it's time to insert the lollipops, I made like 15 of them and thinking I should make more because my kids love them!


Tada!!! Do you want one?! 

 I hope you enjoy this cute project from me today, Valentine is in four days! You still have time, surprise your loved ones with one of these! If you like, (just a suggestion) you can even add note like "Happy Valentine!" or name to the insert bar. Print and stick the message on top of the bar, simple!

CutCardStock Products Used: 


Have fun creating, Happy Valentine to you! - Alexia


Love Your Life Acrylic Card

Tuesday, February 10, 2015
Good day! Thank you for checking out my blog! Last week I shared a banner project with you created using Clear Scraps' CME's February kit and today I have another brand new project to share with you using the same kit! Have you ever thought of sending a card to someone but want it to be a meaningful keepsake item? I made this picture acrylic card which you can keep or display it. You can use this acrylic card for baby announcement, wedding invitation (replaced it with wedding picture), Christmas card, etc. 

Slide out the center piece, it's a mini acrylic scallop frame with stamped sentiment in the center (stamps come with the kit!) that keeps the card stay closed.

And here it is:
 

Here is the picture of my little girl.


Everything that is in this kit is gorgeous! If you haven't already buy the kit and want to get one, you can go to Creating Made Easy Club's online store to purchase. Thank you again for visiting CME blog today and I hope you like the acrylic card project! Have a wonderful day! -Alexia

Auto Post Signature

Auto Post  Signature