Top Social

Picture Life

with embellishments...and rain drops!

Image Slider

Quick Quotes Blog
Showing posts with label Spring. Show all posts

Always Beautiful Layout with New Products From Crafter's Companion

Monday, May 1, 2017
Welcome back! Curious about what Crafter's Companion products will be on coming HSN show? Check out my project below, today I'm sharing this scrapbook layout created using the new goodies. See the textured background? They are stencils and cutting die from the new line by Sheena Douglass called "Create-a-Flower"! To those of you mixed media lovers out there, the stencils are the must-haves! So is the geometrical cutout background, you can diecut it and use the diecut as a stencil too. 

The pink flowers are from the Perfect Parners line by Shenna called "A Rosy Outlook". It has coordinating dies to complement the stamps set so you don't have to worry about fussy cutting. For more details on the supplies used on this project see end of post and click here if you want to see what's exactly coming to HSN this May 9th.


Supplies:
- Sheena Create-a-flower Stamp Set (A Rosy Outlook)
- Sheena Create-a-flower Die Set (A Rosy Outlook)
- Sheena Create-a-flower Background Die(Geomentric Cut Out)
- Sheena Create-a-flower Stencil (A Floral Note)
- Sheena Create-a-flower Stencil (A Leaf Of Graph Paper)
- Die'sire Border Dies 9pk Set
- Spectrum Noir Sparkle Pens (Solar Red, Holly Leaf)
- Crafter's Companion Shimmering Cardstock (Rose Pearl)
- Sara Signature English Country 12x12 Paper Pad

Others:
- Embossing Powder
- Heat Gun
- Enamel Dots (Pink)
- Vellum Paper
- Sentiment Sticker
- Modeling Paste

Happy Easter With Classic Floral Frame

Monday, April 3, 2017
Hello! It's time for Spring and Easter crafts, my first project is this Happy Easter card created using Create-a-Card classic floral frame metal die from Crafter's Companion. To fit the theme I decided to design an oval-shaped egg to fit in the oval frame in the center. 

The ombre background and the colors on the egg were created using Sparkle markers. I love the mini dies set, the flower dies are so versatile you can mix and match the shapes to create different flower looks. I usually create only one card for each design but since this is super cute I'm thinking to create another! Oh, and anyone loves a card swap? Please feel free to drop me a message! :)


Supplies:
- Die'sire Word Dies Set 2 (Celebration)

Welcome Spring Banner

Monday, March 27, 2017
Spring is here! Made this banner to welcome the spring and say good bye to winter. Although it has already been spring time but the weather around here is still pretty cold. However, it's clearly more rains these couple days (April shower already?!!). I still miss the tropical weather that I grew up in, hot summer days most part of the year plus maybe a month or two of rainy season. What's your favorite season? Summer and fall are my favorites, spring would be my favorite too if I wasn't allergic to pollen. Gratefully thanks to the availability of medication able to temporarily suspend the allergy symptoms so I could actually enjoy the beauty of spring.

Here is the banner I made, love the soft beautiful pastel colors. What's your favorite spring colors? 


Foiling on Matching Card and Envelope

Saturday, January 7, 2017
Happy New Year!! I hope you all had a wonderful Christmas / Holidays! Can't believe we are in the new year already and what's coming next is the Chinese New Year or the Lunar New Year! The Lunar New Year falls on the 28th of January this year (it's different each year referring to the Lunar Calendar). So I make some cards with matching envelopes to be sent to my family who live on the other side of the planet (I miss them dearly!). 

To those of you who are curious about why red is the color? In Chinese culture red symbolizes good fortune, joy and prosperity. Which is why red packets/envelopes and Chinese New Year cards are usually in red. 


First I printed some Koi images on a cardstock with my laser printer (only the toner from laser printer will work with the foiling process). I then run the images through Heidi Swapp foiling machine with gold foil sheet). Next step would be coloring the foiled images using Spectrum Noir Alcohol Markers. Fussy-cut the images out for use on the card, apply double-sided foam tapes on the back of the cutouts and position them on the card for a dimensional look.

For the envelopes, I printed the same image on the corner of my envelopes using my laser printer then I run it through the foiling machine as shown below. The foil sheet should be placed over the printed image, note that all printed area should be completely covered with foil or the toner will stick to the transfer folder (the clear plastic shown in picture). Also, make sure there is no small particle in between the printed cardstock and the foil sheet or it will result in unevenly foiled image. Choosing the right paper/cardstock is also very important in foiling, I researched and learned that cardstock with smooth/glossy surface will give a perfect smooth and sleek (spotless) foiled surface compared to a textured one.


See picture below for before and after the foiling, don't you just love the sparkly gold? It's so cool to receive this in the mail! And it matches the card, how I wish someone would send me one! :)


For the address label, I used the Avery label you can find in CutCardStock store. Did you know you can print the labels on Avery website? Besides, they are a lot of free templates you can choose from. I also just found out you can choose to print on certain labels on the page instead of the whole sheet of 30 labels! This is good when you only want to print few labels for one per person and use the rest for different addresses. 


I hope you like this project, I will be back to share more project ideas soon! Happy crafting!

Supplies:
  

Love You More Everyday Layout

Wednesday, March 23, 2016
I don't usually do scrapbook but once in awhile I encourage myself to create some for the sake of keeping track my children's growing-up process. I chose to make this Spring themed layout with my daughter's picture. 


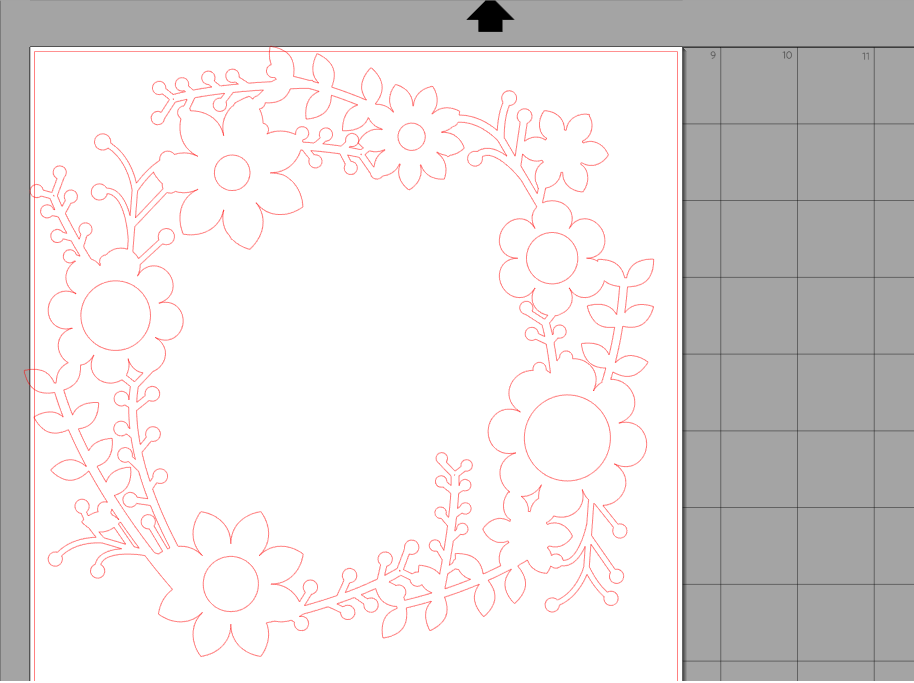
Step 1: Cut the floral background using Cameo, this design can be found on Silhouette online store. Curious Metallic card stock is used.


Step 2: Color the negative from the die-cut with Spectrum Noir Alcohol Markers then fit the puzzle back together in the main die-cut floral frame. Use regular tapes to connect all edges together.

Do the same to the circle cut-outs from the floral frame (coloring with alcohol marker) and adhere them on a 12 x 12 patterned card stock of your choosing, Make sure to line up with the original die-cut so you know where exactly to stick the circles. This is to create a pop-up effect by adhering the floral frame die-cut using double-sided foam tapes later.

Step 3: Apply double-sided foam tapes on the die-cut from Step 2 and layer/stick over the pink circles. 

Here is how it looks like, you can see the three dimensional effect. 

Step 4: Die-cut the picture using circle die and start embellishing! The cherry trees were die-cut on Curious Metallic - Chocolate card stock. 


I hope you like this scrapbook project. It's fun to scrapbook now I can't wait to make another one soon! You have a wonderful day!

CutCardStock Products Used:


Woven Easter Basket (SVG provided)

Tuesday, March 8, 2016
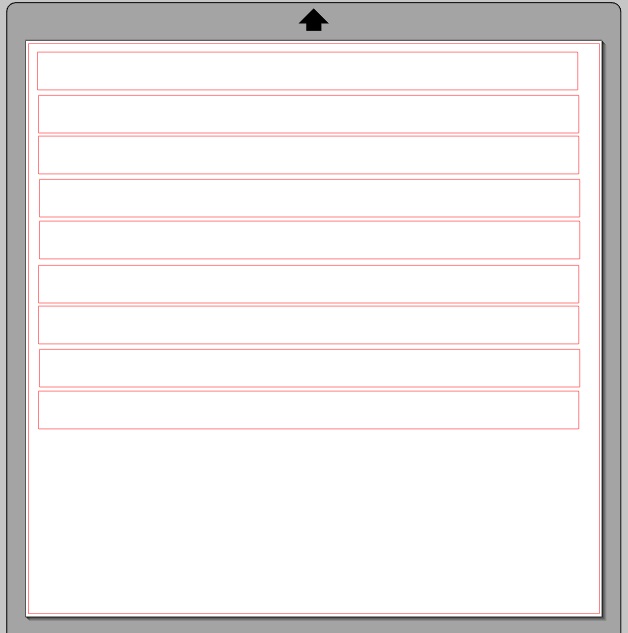
Hi all! I'm glad to be back to CutCardStock design team to share more creations with you. This is my first post for the new term and since Easter is approaching, I made this woven Easter basket to share with you! I created this with my Cameo and I have also prepared the svg file for you if you are interested in making these. (Please download the file at end of this post).


Directions: 
Step 1: Download svg file and prepare the cut-outs. 

You will need to make more than one cut with different color card stocks.

Step 2: Follow each step in the picture below to make the basket. First start with preparing all the necessary supplies, in this case the base for the basket and strips of card stocks. Second, insert the card stock strip horizontally into the pre-cut vertical line on the base just like weaving a basket (cut the excess card stock strip). Third, glue shut the loose ends. Finally, apply double-sided adhesives on all tabs.


Step 3: Fold and glue the excess card stock on shorter sides (the width) of the basket. Assemble the basket by connecting all the tabs together.

Step 3: To make the handle for the basket, insert one of the card stock strip behind the woven pattern, such as shown below. Then do the same with the other end of card stock strip but the insert will be inside the box instead.

Here is the completed basket. If you prefer, apply ribbon around the handle and fancy or lace trims around the basket, such as shown in second picture below.

Completed baskets!


I hope you enjoy the tutorial and decide to make one of these. Happy Creating!

Download Svg File: Woven Easter Basket

CutCardStock Supplies:


Auto Post Signature

Auto Post  Signature