Top Social

Picture Life

with embellishments...and rain drops!

Image Slider

Quick Quotes Blog
Showing posts with label Fall Project. Show all posts

Happy Thanksgiving!!

Thursday, November 23, 2017
Happy Thanksgiving everyone! I just want to tell you how grateful I am to have you all wonderful supporters, couldn't have come this far without you. Thank you!! I hope you are having a good time with friends and family today and eat that Turkey while it's hot! :) If you missed the post on Monday, check it HERE to enter yourself a chance to win a $10 gift certificate to Crafter's Companion online store! Entry open till 26th 11:59pm EST. 

Made this card using the Garden Vines die from Sara's Autumn Morning collection, I first colored with sparkle pens in fall colors on the watercolor cardstock and die-cut it on a four-frame design. Then I used different color cardstocks in the background to make the cutout pattern stands out, darker color are preferred since the color of the vines are pretty bright on its own.


Lots of love!! 

Supplies:
- Sara Signature Autumn Morning Metal Die (Garden Vines)
- Crafter's Companion Die'sire Essentials Dies (Nature)
- Crafter's Companion Watercolour Cardstock- Crafter's Companion Luxury Cardstock (Gold)
- Crafter's Companion Die'sire Celebration Word Dies (Set 2)
- Spectrum Noir Sparkle Pens (Moonlight, Harvest Moon, Smoked Quartz)
- Gemini Junior Machine

Pop-Up Panel Thank You Card

Saturday, October 8, 2016
Hi all! I'm back today with one of the recent popular projects - a pop-up panel card. This panel card is one of the most discussed projects I have seen in some crafting forums so I decided to make one myself. It's actually pretty easy although the tutorial may seem a little long and challenging. I managed to create a template in svg format if you are interested in making one of this super cute and interactive card. 

Here is what I'm talking about....

This is how it looks like once it's opened up...cool?!


I will explain to you how to create this cute project in the tutorial below, but first download the svg cut file from the link at the end of this post. 

Directions:

Step 1: Download file and cut the svg images shown on your Silhouette Designer Studio.

Step 2: Take the main cutout, place on the scoring board and score at 4 1/4".

Step 3: Align the lines together and fold (as shown in picture below). Do this to the other side as well.

 Once you did all the above, fold both wings inwards to form a structure below.

It should looks like this when closed.

Step 4: Take the second piece of cutout - the panel, fold along the dotted lines. The panel size should be 2 3/4" x 11" (Do not change the size before cutting in Silhouette Designer Studio).

Step 5: Apply double-sided adhesives on alternate sides of the wings, refer to picture below. Then stick the panel over it as shown in second picture in this step. Note: Leave about 1 1/2" outside the each wings.


Step 6: This is a decorating step, embellish the panel and card. 


Step 7: Trim a standard size card base which is 4 1/4" x 5 1/2" and adhere the result from Step 6 to inside of the card base.  Finish the front of the card with patterned paper and sentiment. Done! 


I hope you enjoy making this interactive card, you won't regret it! I'm going to make couple more of this and send it out for Thanksgiving! Happy crafting.

Download SVG: Pop-Up Panel Card

Supplies:


Thank You Card For Fall

Saturday, September 24, 2016
Fall is one of my favorite seasons, love the strong breeze and the colors of fall foliage. So I created this fall card today to share with you, a thank you card perfect for this thanks-giving season. I love the shimmering curious metallic super gold cardstock with the gold foil, orange and yellow cardstocks together, brings out the festivity around this time of the year. 


Directions:

Step 1: First die-cut the Super Gold curious metallic cardstock using this rectangle stitched die from Simon Says Stamps. Save the cutout on the left for another card or project.

Step 2: Prepare all the embellishments (leaves, branches, bird, hill layers, and a brown color inner frame). Prepare desired sentiment to be used on this card as well.

Step 3: Apply double-sided foam tape to the back of the frame from Step 1 and adhere the hill layers to it followed by the brown inner frame prepared in Step 2.

Step 4: Emboss a gold foil cardstock with leave-patterned embossing folder and adhere to the back of of frame / right on top of the brown frame as pictured below.

Step 5: Embellish the card with cutouts from Step 2 along with the sentiment.

And done! I'm going to make couple more of these to send out to friends and family, what's better than a handmade thank you card for a person you care/love to thank them for being awesome?! I hope you like the card and it inspires you to create some too. Have a fabulous weekend! - Alexia

Supplies:


Fun Halloween Treat Box

Saturday, September 10, 2016
Hi all! This is Alexia and I'm back today with a fall project - fun Halloween treat box, can't believe Fall is here already. I love autumn but I miss summer very much too, what a conflicting feeling. Anyway, Fall is here which means Halloween is around the corner (even though it's 'just' seven weeks away - hehe).

I created this bat Halloween treat box or gift box, fun for parties and treat or treating. Download the cut file below to get this project started!

Step 1: Download svg cut file from the end of post. Open with your Silhouette Studio and cut the images separately. Total of two cut images. Image size may be adjusted accordingly to your paper size or to the size of box that you want. Note: When resizing, make sure to 'select all' and resize both images together so the cover and the box itself remains the same size.


Step 2: Here is the sample of the cut out image for the box cover, assemble flaps together to form a cover as shown in second picture below.


Step 3: Cut couple of orange squares and adhere to the sides of the box and the inside of the box cover. As pictured below. The adhere all white flaps together to form a box.


Here it is!! I created two different sizes and they are perfect for filling up with treats. For bigger size of box, you may cut half of the image on one sheet of A4 and cut the other half on another then assemble the two together to make one big box. 

I hope you like this Halloween project! Looking forward to sharing more fall projects with you soon. Have a creative day! - Alexia


Supplies:


Download Cut File: Halloween Treat Box SVG

Sent With Love with Sparkle Pens

Saturday, January 30, 2016
I'm back with another card I created for Crafter's Companion CHA! I was not able to share this until after CHA so here it is! If you haven't check out this stamp set yet I encourage you to, HERE! It doesn't just have the cute deer stamp I used to make the Spring-theme card and THIS but also this super adorable fox stamp I used to make this fall card. 

Love, love, love the Sparkle Pens, it makes your project stands out because it sparkles! Besides, like I mentioned in my previous posts, it only takes one pen to create different shadings all you have to do is add water! How easy and fun! 


Supplies:
- Crafter's Companion Watercolor Paper
- Spectrum Noir Sparkle Pens (Harvest Moon, Smoked Quartz, Clear Overlay)
- Die'sire Decorative Dies - Chantilly Lace Stamping Frame
- Crafter's Companion EZMount Stamp Set - Forest Friends
- Sentimentals EZMount Stamp Set - Memories are made


I hope my card inspires you to create! Happy Creating!

Thanks DEER (Dear)!

Saturday, January 23, 2016
Here is the Fall-theme card I was talking about in my previous post! Using Crafter's Companion Stamp Set and Sparkle Pens. If you see it in person (or really up-close in this picture) you can see that the colored images are sparkling. 

The cool thing about the Sparkle Pens is that it's water-based so you can mix it with water to create a softer tone of color. Such as the colored image below, I only used one color pen on the deer to create the shadow and the light source areas. Isn't that amazing?!? 

Supplies:

What do you think about this card? I would love to hear from you! Thank you so much for taking time to check out my post and have a crafty weekend! 

Upcycled THANK YOU Gift Box

Friday, November 20, 2015
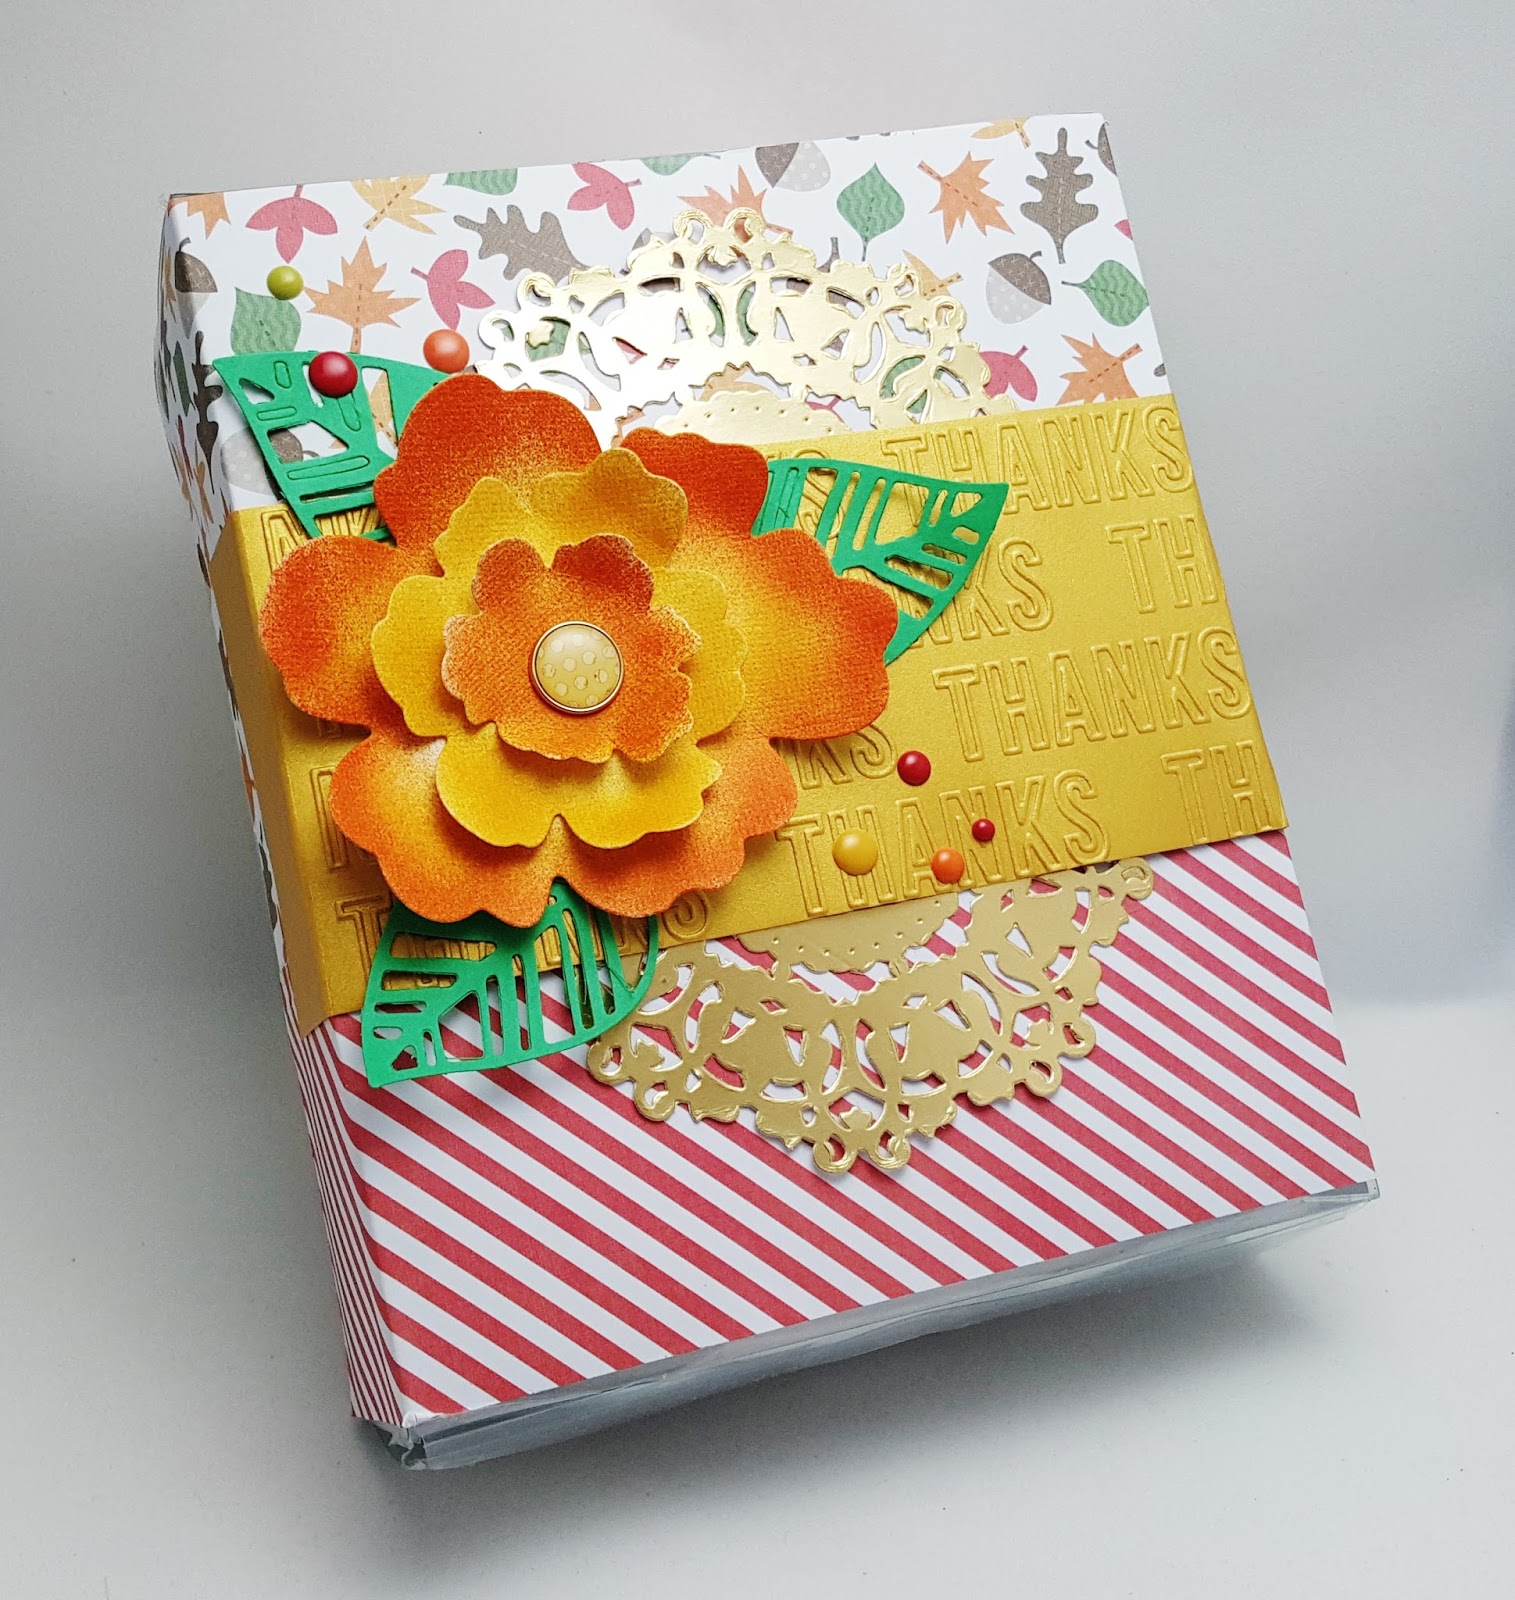
Hi all! Today I want to share with you on how to upcycle a recyclable item into something useful! I had this clear packaging box that I turned into a gift box which I then used to store handmade cards and sent it to my son's school teacher. So instead of sorting it away for recycling, have a makeover and use it again! Besides, I think it looks pretty good for a gift wrap. What do you think? Now you can tell that I'm a hoarder..... ***blushed*** 


Here is the clear packaging that I had...

And I turned it into this....

To make this, you will need:

- A reusable box packaging
- Fall Patterned Papers
- Gold and Foil Card Stock (Optional - you can replace with other color card stock)
- Couture Creations Doilies Die
- Sharpie Markers (Fall Colors)


First die-cut all the embellishments using the dies and Cut 'n' Boss, as shown in following picture. Also, prepare strips of patterned papers and glue around the clear box. Place and adhere doilies on top of the patterned paper and then emboss + adhere the THANKFUL shimmering gold card stock over the doilies.

Lastly, air brush the Layered 3D flower die from Teresa Collins, and assemble it. 

Decorate the box with the layered flower and you have this brand new box...

I hope you enjoy the walk through of this project, it doesn't involve many steps and it's always worth it to make something for someone who you know will make a good use of it. :) Happy crafting folks and have a memorable Happy Thanksgiving!! - Alexia

Auto Post Signature

Auto Post  Signature